
Leather polka dots scarf
Here is a quick and easy way to make your everyday scarf look more sophisticated. You don’t need any special tools or expensive materials: just a small piece of leather perhaps from old clothes or accessories, a scarf of your choice or any piece of fabric you like, a pen, a triangular ruler and a file binder hole punch. Oh, and a spoonful of patience. To finish, you will need some type of adhesive. I used the one for fabrics because it’s washing and ironing resistant.
I found this DIY so easy and yet so effective. Give it a try!
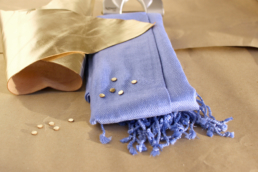
Step 1 – Make leather confetti with the file binder hole punch.

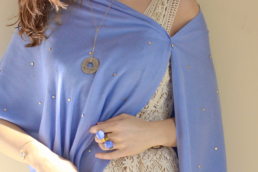
Step 2 – With the pen and the help of the triangular ruler, mark the spots for the leather dots on the scarf. I´ve started from the centre of the scarf and worked towards the sides, marking one dot for each edge of the triangle. For the next dot, I’d move it towards a free space, always having two corners at existing dots as a reference. Another way to do it is using an existing piece of fabric that already has dots: you can place it underneath the scarf to copy the pattern, provided the scarf allows you to see through a bit. In any case, it’s not necessary to be super precise. Once the scarf is placed on the body, a small mistake in the distance is not that noticeable.

Step 3 – Put a small amount of adhesive on each of the dots that you’ve marked.

Step 4 – Place a leather dot on top of each dot with adhesive and allow it to dry.

It might look like a lengthy process, but it took me only around an hour to finish it.
Even though the adhesive is transparent, once it’s dry, you can still see it on the other side of the scarf if the fabric is light. So, I thought it might be a good idea to put leather dots on the other side as well: exactly on the same places. I plan to do this in another colour. This way, my scarf will have two different sides.